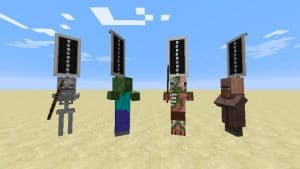
A banner in Minecraft are tall blocks specifically made for displaying designs or patterns. Minecraft banners are found naturally-spawning, but the results are limited to simplistic white flower banners in Woodland Mansions and villager face banners in pillager outposts.
Creating your own banner is a relatively straightforward task. It requires only the correct materials, and it can be accomplished by following this strategy!
Step 1: Create or find a banner in Minecraft

First, get a banner! You can usually loot one by attacking one or attacking a villager who is holding one then inspecting what dropped. Otherwise, you can create your own by gathering six segments of wool in matching colors and combining them with a stick.
Step 2: Bleach the banner if necessary
It’s not required that you bleach the banner before starting your project, but it does give you a white canvas to start your design process and defines patterns if you found or looted the banner. You’ll need bleach, which can only be made with a lab table (available with the Education edition or if you type direct commands) on top of combining three water and three sodium hypochlorite. Now you can make the banner by crafting it with bleach to clean it up.
Otherwise, we suggest just starting with white wool when crafting, since that will yield the best results.
Step 3: Add dye to the banner

If you don’t have any dyes yet, now is the time to start gathering, buying, or crafting them. There are 16 possible colors available in total so pick the ones that you need and get to work! Bone Meal, ink sacs, flowers, and plants can all be used to create dye for your items.
Before crafting the dye, you must have enough dye to work for your project. The key is proper positioning: Putting your banner and dyes in different areas of the 3×3 crafting grid will help produce a pattern on your completed banners.
The placement of most symbols is largely intuitive, especially if you want to create a crest-inspired design. Putting a single dye in the corner of the crafting grid, with the banner in the middle, will yield square shapes of color that fill the section. A dye in the center of a banner will create a large dot. Surrounding the banner with dyes will create a border of that color. You can create a gradient by setting dyes in the upper right and left corners and the bottom two middle sections of the crafting grid. X’s and crosses are also created by applying dyes in specific patterns. Dyeing a banner in the form of a triangle can create chevrons at the top or bottom of the banner, or diagonally divide it according to placement — and so on.
Read More: How To Tame A Horse In Minecraft
Special Designs
Customize your banner by adding in additional items with the dye color you want to use. These options might include:
- Brick: Adding a brick will create a pattern. Add one dye and some bricks to make your own colorful brick patterns.
- Vine: Crafting a vine, dye and banner will produce a wavy border in your preference color.
- Creeper head: in the color of your choice creeper head gives you a Creeper-like face on the banner, Wither skeleton
- Skull: Use this to make a crossbones design and skull .
- Oxeye daisy: Provide a vague flower shape.
- Enchanted gold apple: Use this to get the Mojang logo.
It is possible to create dye patterns on a banner multiple times! This can be used to combine or layer your designs for the perfect effect that you want. Minecraft also has a tool for experimenting with various blocks and materials. People have even created everything from national flags to crests for families in Game of Thrones, so there is plenty of advice available.
You can make your team’s banners even more unique by using a variety of logos with the loom, but this is not necessary to achieve the look you want.
Step 4: Place your banner

With your design ready and the banners you’ve made, now it’s time to place them. Banners have no collision mechanics and are placed either on the wall or ground. Lava does not hurt them, and even if it is necessary for them to do so, objects can easily pass through them.
Step 5: If necessary, use multiple banners
Sometimes using one banner won’t create the design you want; for example, when spelling out a sentence or making a billboard. For these circumstances, you will need to make several banners and position them in the same place so that their colors work together to form an even more complex design.
If you want to make a banner with the same colors, just add a blank banner and your banner in the crafting grid. When recreating a design, this allows you to copy the design without needing to gather all of the materials again.
